The following is a step-by-step guide on how to install OpenVPN on Microsoft Windows manually.
OpenVPN is an open source SSL VPN which can tunnel over UDP or TCP ports. We have UDP and TCP OpenVPN servers running on port 53, 80, 443, 1109, 1194 and 8292. ECC, RSA 4096 bit and AES 256 bit encryption supported.
OpenVPN for Windows can be installed on Windows 7, Windows 8.1, Windows 10 and later. It is also compatible with Microsoft Surface and Surface Pro tablets.
Why run VPN on Windows PC?
- Hide your IP address and protect your privacy and security on Internet.
- Stop your ISP and public hotspots snooping on your online activities.
- Access geo-restricted and censored websites.
Installation Summary
- Download Password File. This is required to save your password and auto login to VPN.
- Enjoy!
Note: Youtube installation video was created with older version of openvpn software. We no longer bundle OpenVPN config files with the software and provide config files for different ports as a separate download. We will be updating the video shortly to reflect the changes.
OpenVPN Installation
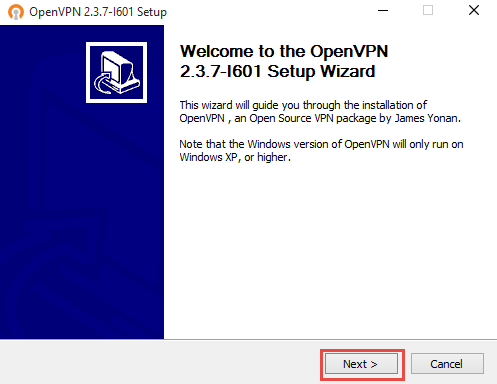
- Download OpenVPN software to your drive. Run the installer by double clicking on the file you just downloaded.

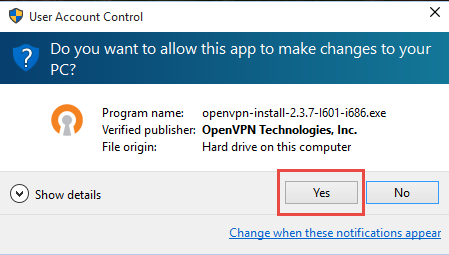
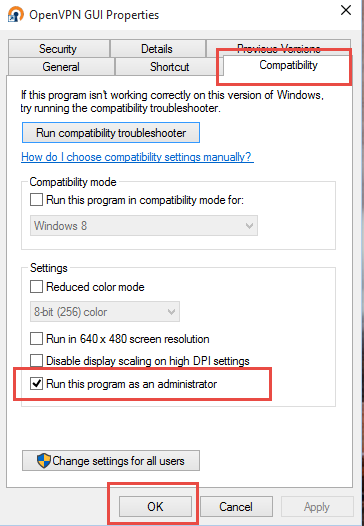
- Hit Yes on the User Account Control prompt that appears. This will run the installer as administrator.
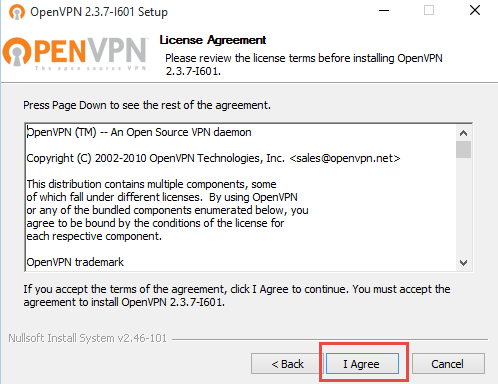
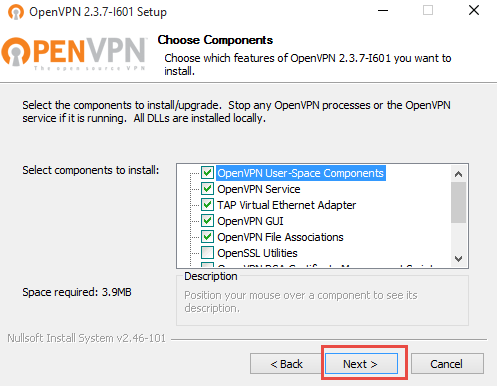
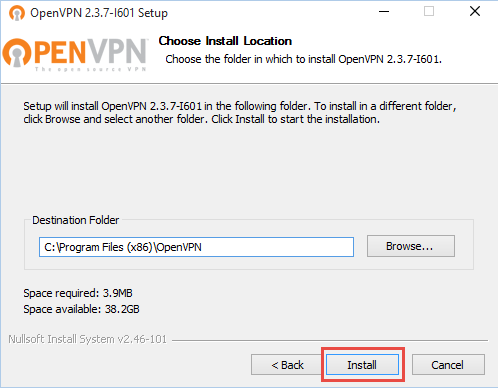
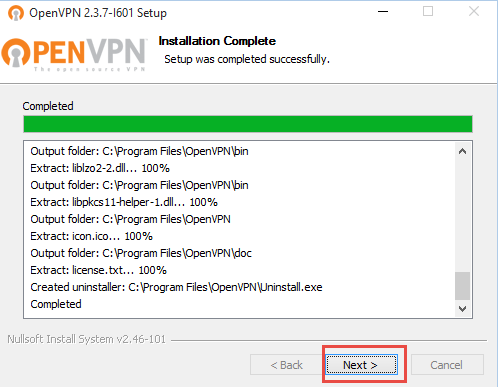
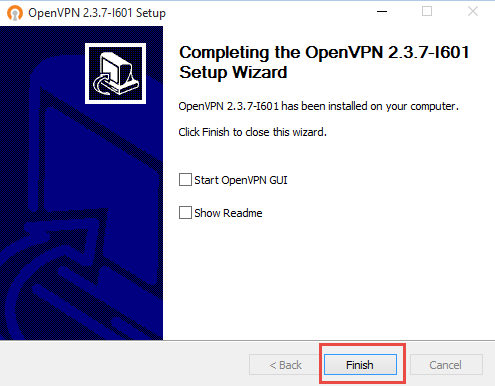
- Follow the prompts to install OpenVPN on your device. Leave the options to its default.
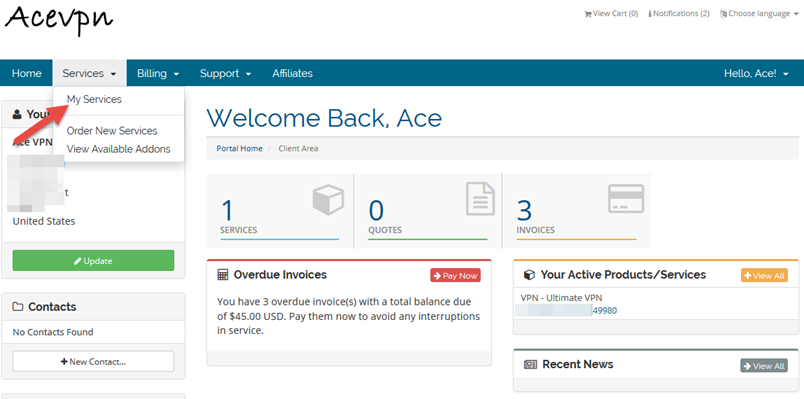
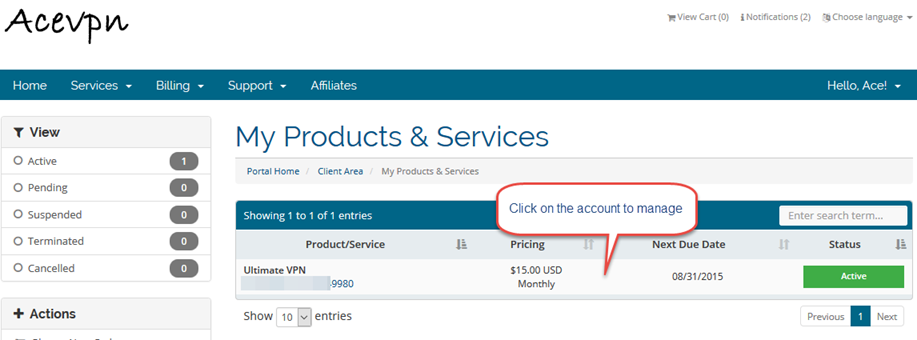
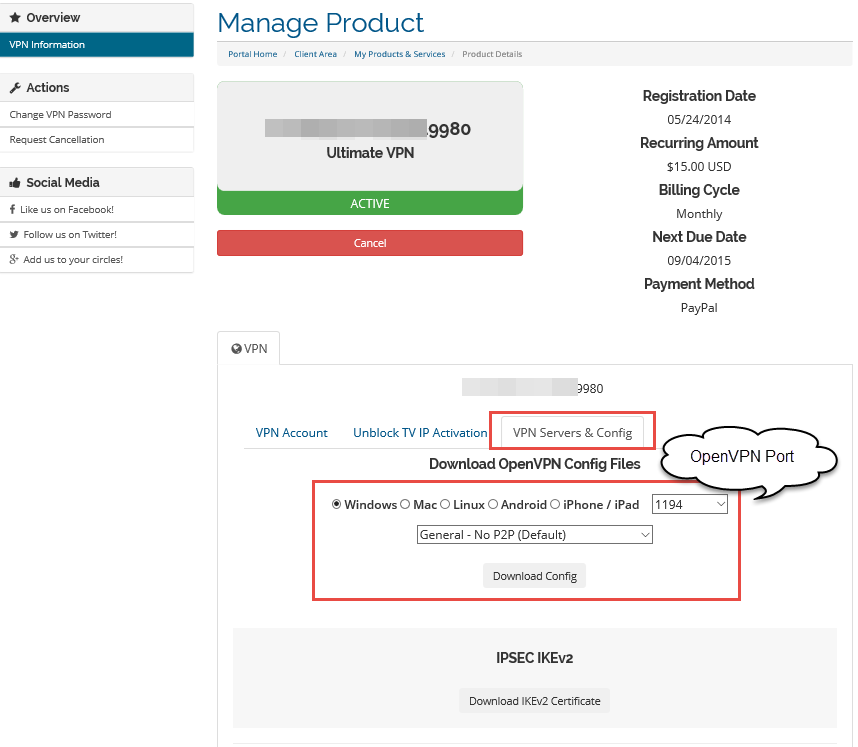
- Visit Members Area in your browser. Under Services menu choose My Services and choose View Details.
- Hit the button Download Password File (Windows Only) and save it to a folder on your C:\ drive. For eg.
C:\temp\acevpn-pass.txt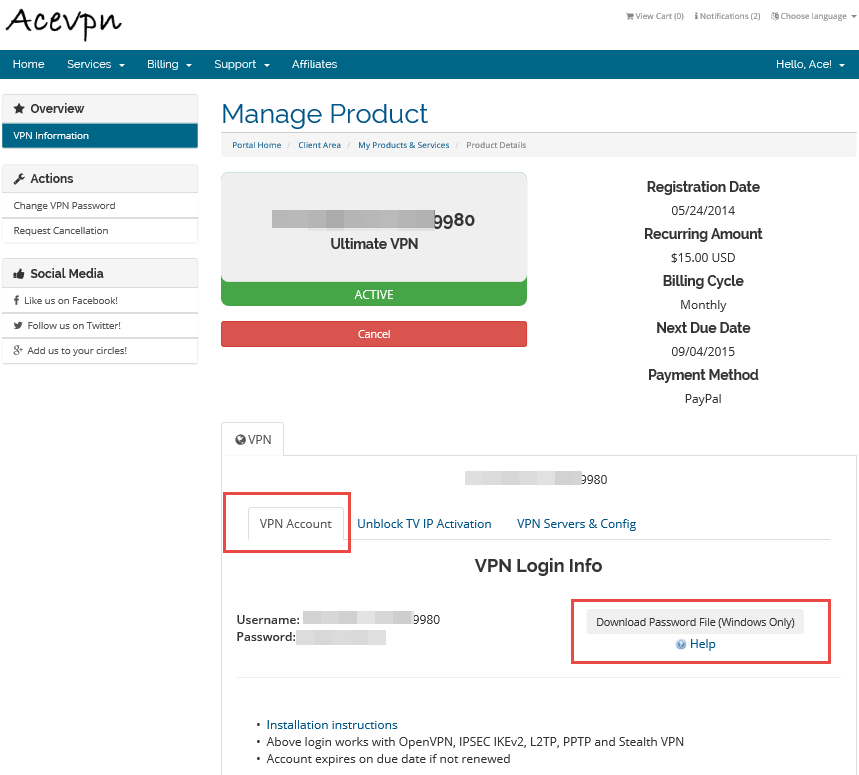
- Now copy this password file to the following location. Replace the file in the destination folder if it exists.
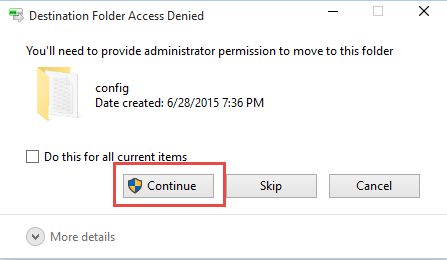
C:\Program Files\OpenVPN\config - If you are prompted for administrator permission, choose Continue.
Note: You will get authentication failure if you miss this step.
- On VPN Service Details page switch to VPN Servers & Config tab.
- Hit the button Download Config and save it to a folder on your C:\ drive. For eg.
C:\temp\
- Extract the files in the zip and copy the files to the following location.
C:\Program Files\OpenVPN\config\ - If you are prompted for administrator permission, choose Continue.
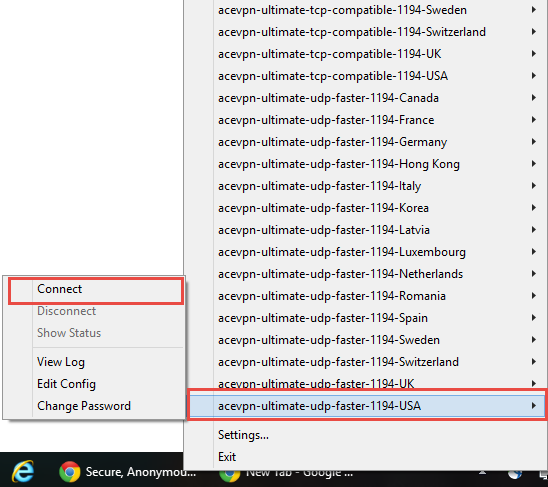
- Double click on OpenVPN icon on your desktop to start the program
- Right click on OpenVPN icon next to clock, choose the config you wish to connect (eg. acevpn-ultimate-udp-faster-1194-USA) and choose connect.
- OpenVPN will establish a secure tunnel to the VPN server. All traffic originating from your device will get encrypted and go through the secure tunnel.
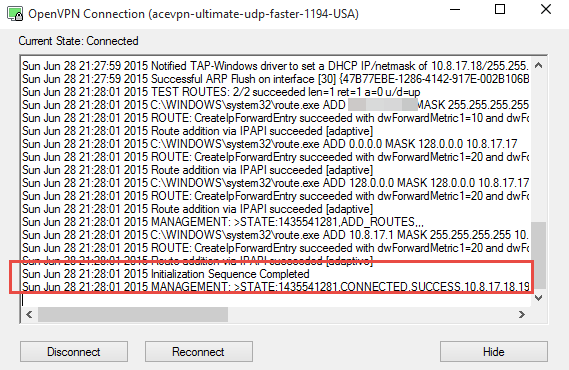
- To verify, check your IP address. If VPN is active, you would see VPN server IP address.