Acevpn IKEv2 VPN servers use Elliptic curve encryption. The following is a step-by-step guide on how to install Ace VPN connection using the IPSEC Internet Key Exchange (IKEv2) protocol on Microsoft Windows 8. Installation instructions for Windows 7 is similar.
Summary:
- Download and import Acevpn Root CA.
- Setup Windows 8 / Windows 10 Network connection.
Installation instructions
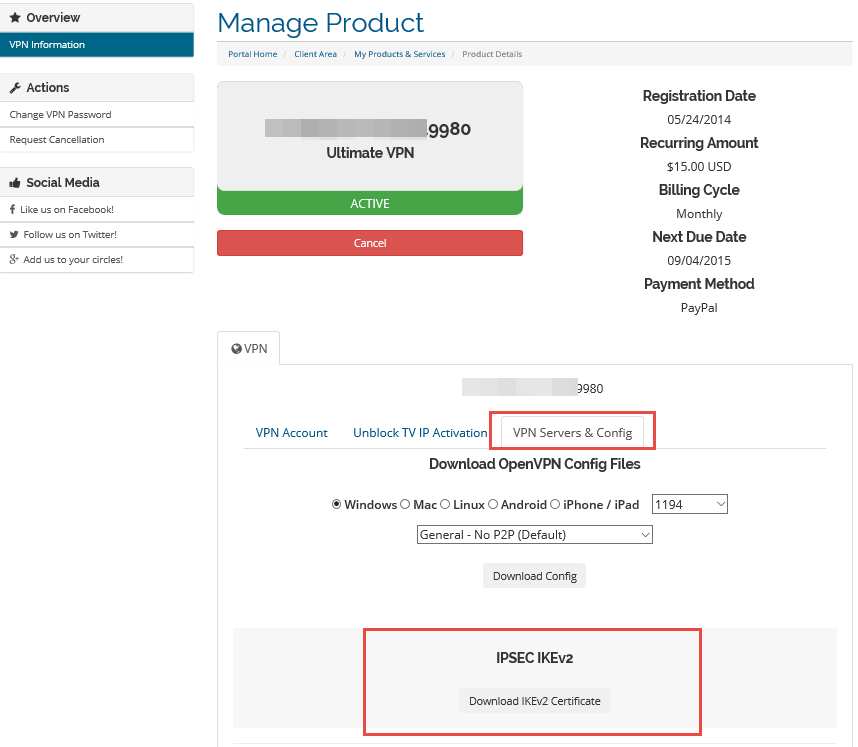
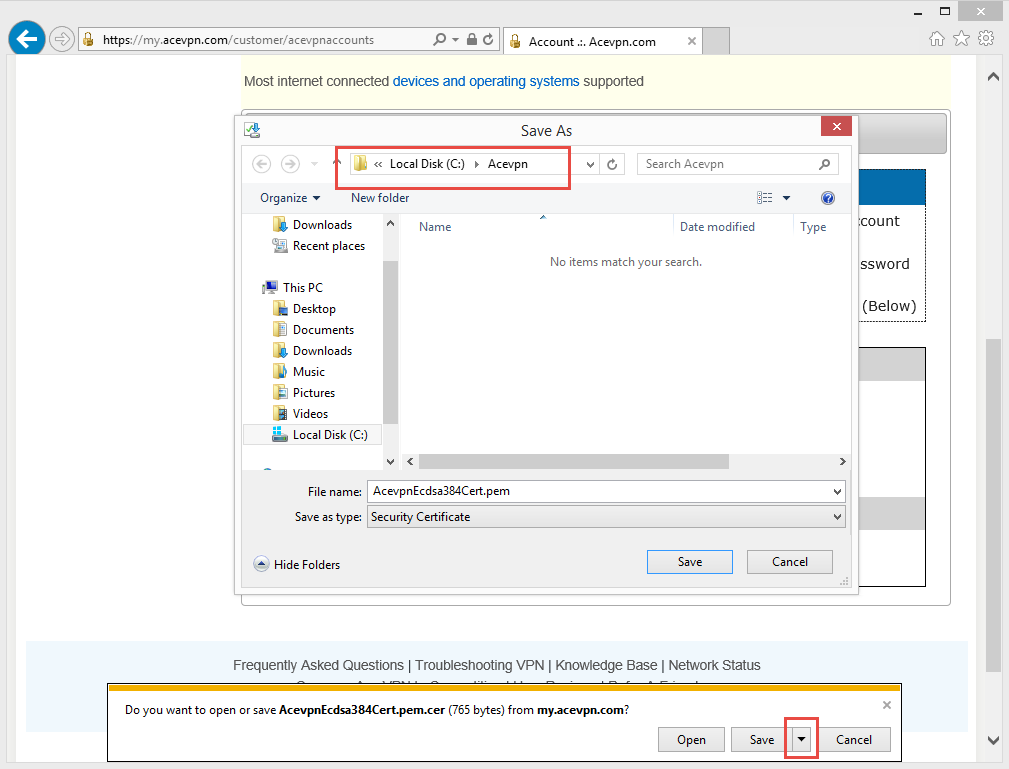
- Download IKEv2 certificate from Members area and save it to a temp folder eg. C:\Acevpn.


Open Certificate manager
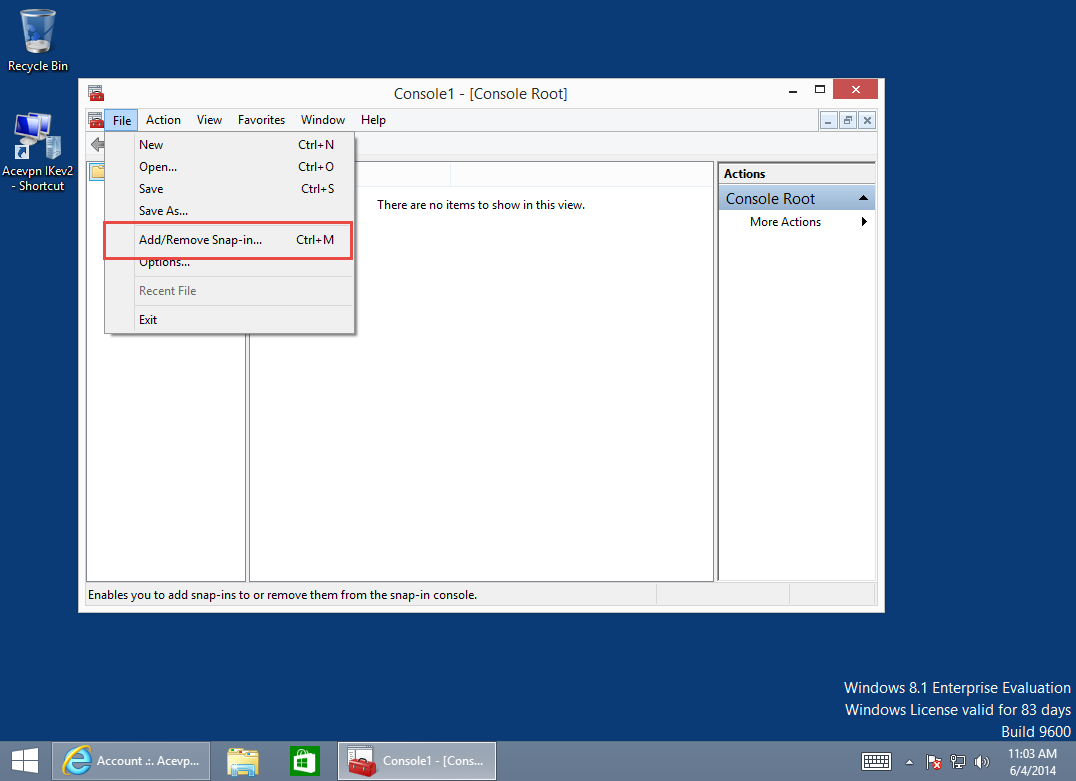
Start -> Run: mmc.exe

- Run mmc as administrator. Hit OK

- MMC console opens

- Menu: File -> Add/Remove Snap-in
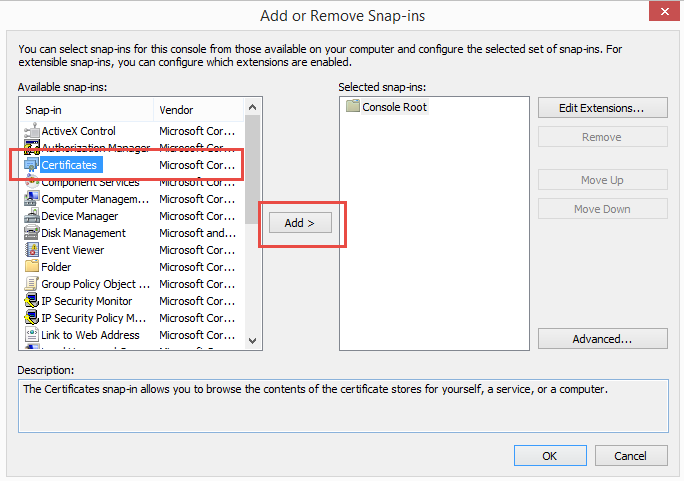
- Under Available snap-ins, select Certificates and press Add > button.
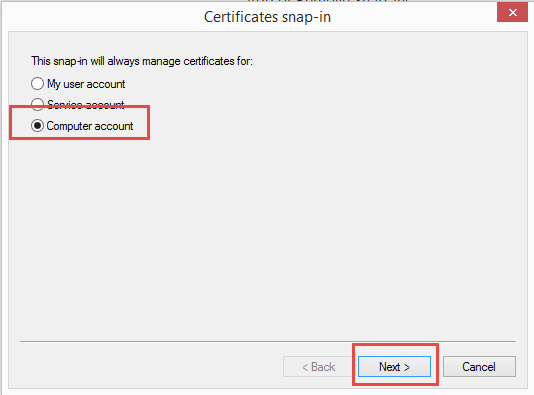
- Select Computer Account for the certificates to manage. Press Next.
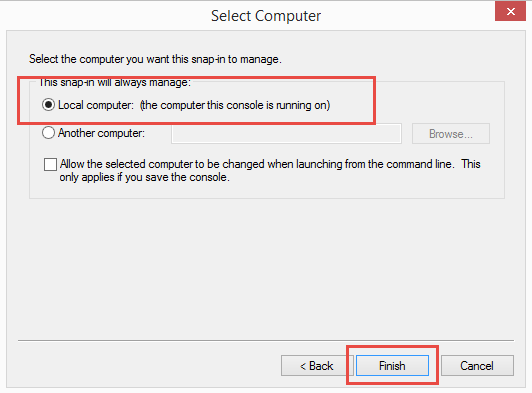
- Select Local Computer and press Finish.
- Press OK to return to the management console.

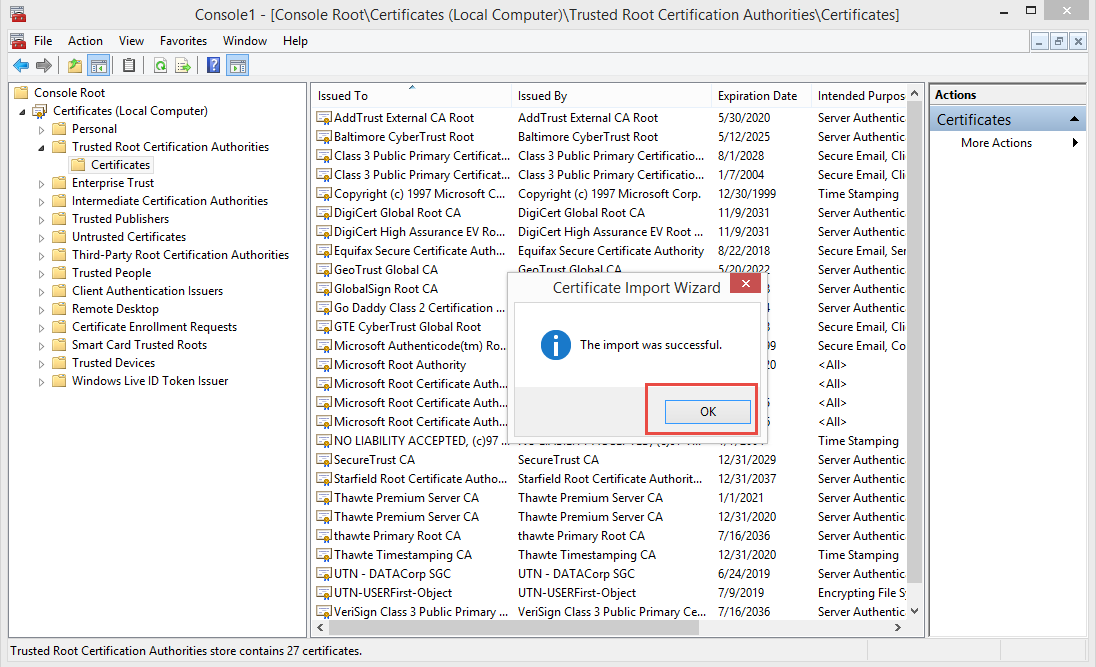
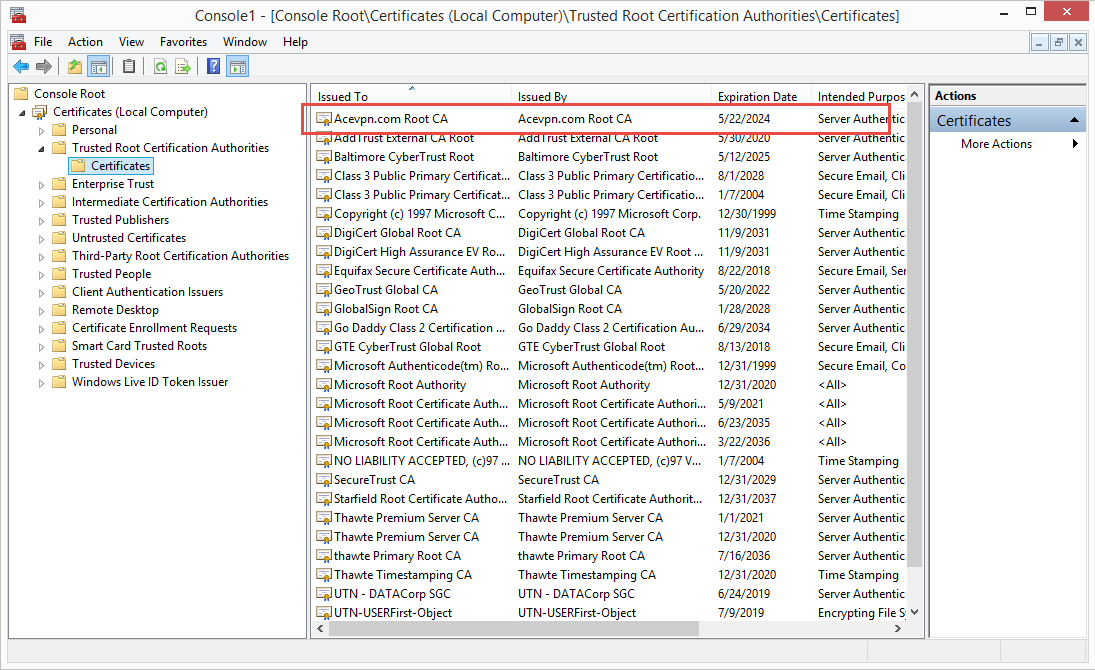
Import the certificate:
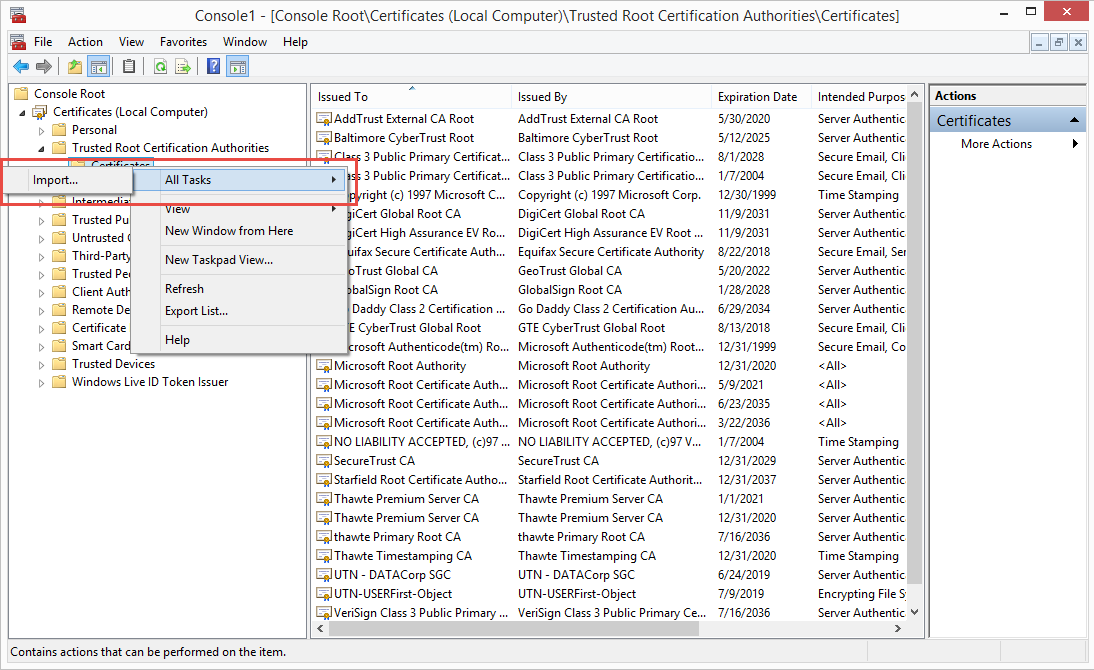
Select: Console Root -> Certificates (Local Computer)
- Continue and select: Trusted Root Certification Authorities -> Certificates.
- Right click on Certificates and select All Tasks -> Import
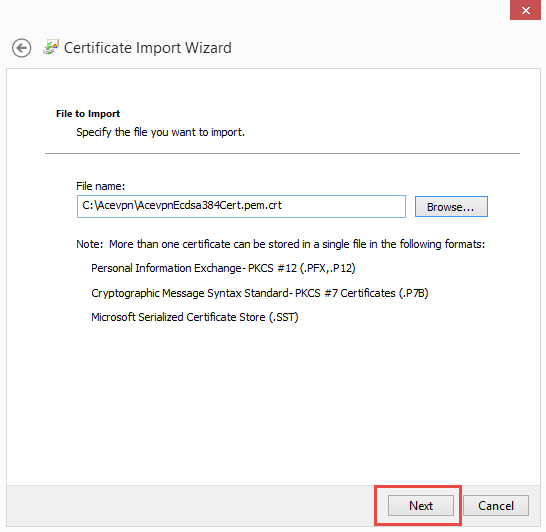
- Follow the import wizard and import your certificate normally.


Configure IKEv2 Client Connection on Windows 8
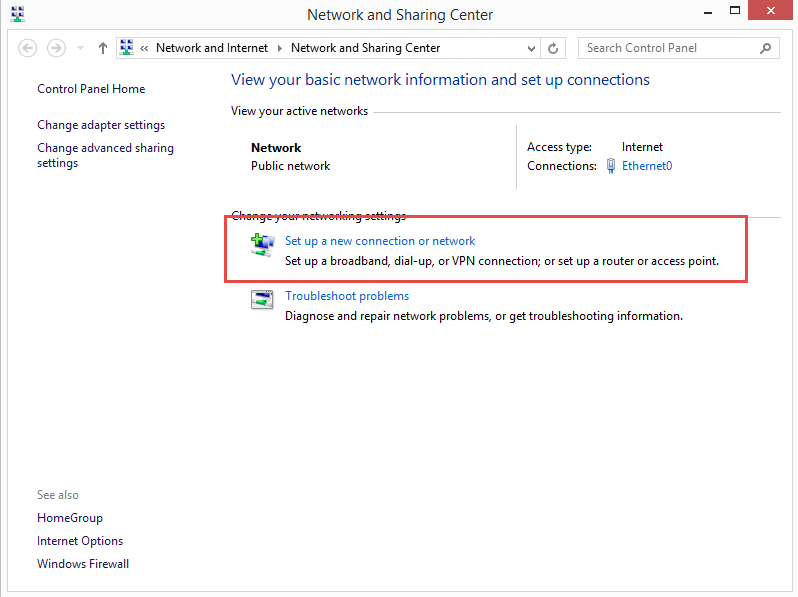
Start: Search Network and Sharing

- In the Network and Sharing Center choose Set up a new connection or network and as a connection option select Connect to a workplace


- Click on Use my Internet connection (VPN)

- Input Ace VPN Server IP address. The destination name string can be chosen freely – let’s call the connection Acevpn IKEv2 Atlanta and hit Create.

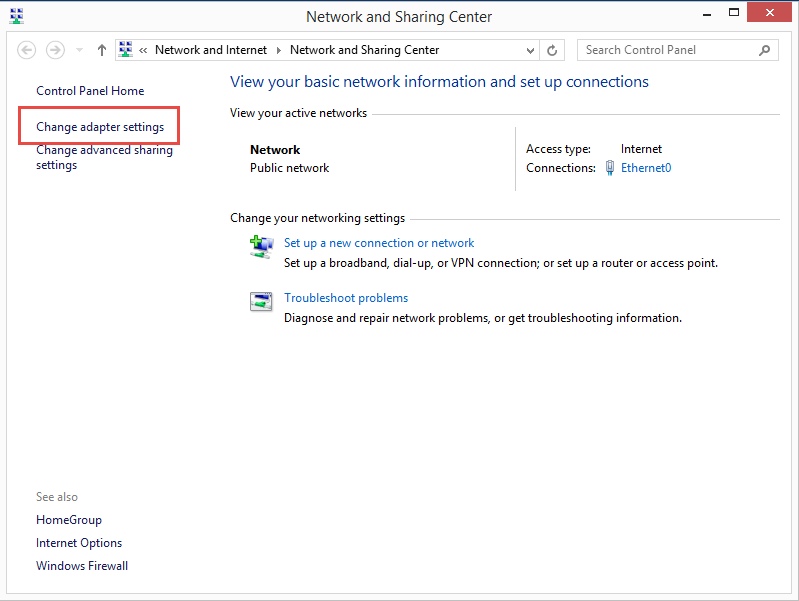
- Choose Change Adapter Settings link
- Right click on newly created connection and choose Properties
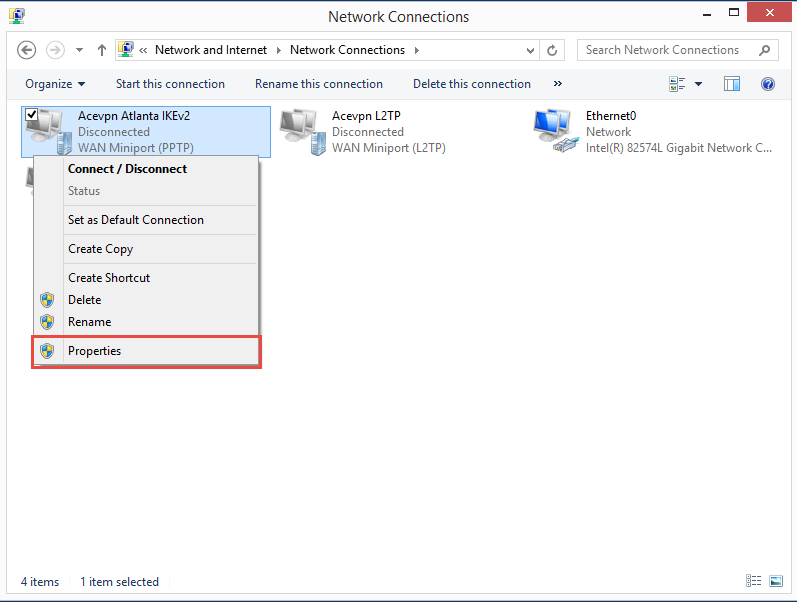
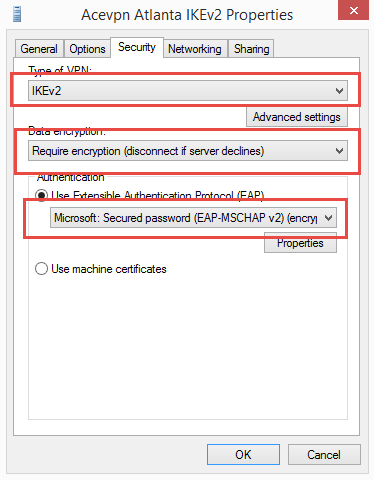
- Switch to Security tab. Choose Type of VPN: IKEv2, Data Encryption: Require, Authentication: Microsoft: Secured password (EAP-MSChAP v2). Leave rest to its default values.
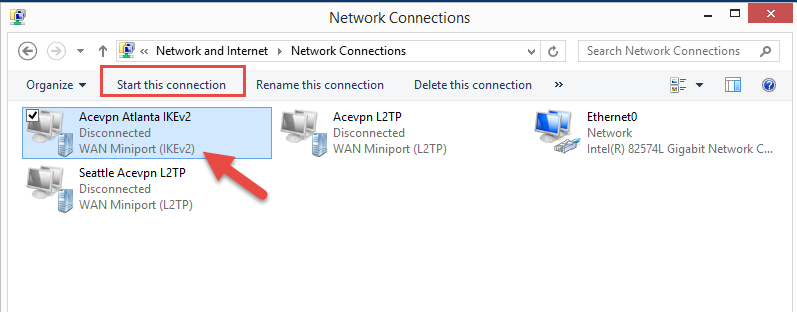
- Start VPN connection

- Input your VPN username and password

- VPN Connected. Enjoy your secure and private internet service.


- Check your IP address on www.acevpn.com to confirm that your IP has changed.